Friday, August 27, 2010

The importance of Geometry Flow

As the schedule goes, right now I ought to be rigging the chef character. I'm a couple days behind schedule, but for a very good reason relating to bone-based (or joint-based) face rigs. The next post will likely cover that.

For this post I'd like to go a couple weeks back in time and show you two images of the chef as I was working on him:


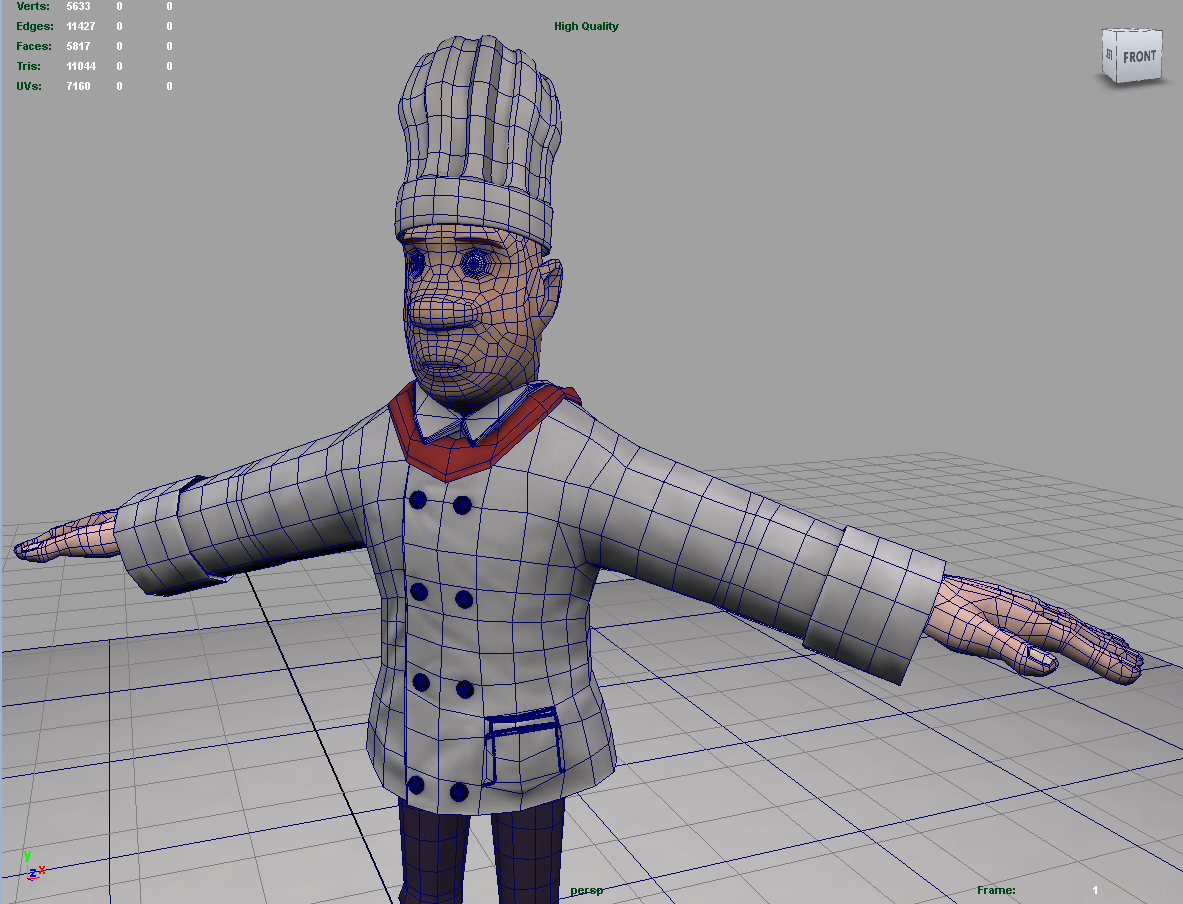
I'd like you to look at the areas around his shoulder. When I was first modeling the character, my first temptation was to just take a chunk of his shoulder and extrude it straight out. That would make sense, right? Just drag out some part of his chest like a piece of play-dough and BAM! Instant arm.

The problem is that when this gets animated, this first approach fails miserably. Characters spend their time with arms down at their sides in one manner or another, so this first character's shoulders would be stretched into ugliness for a huge majority of the time.

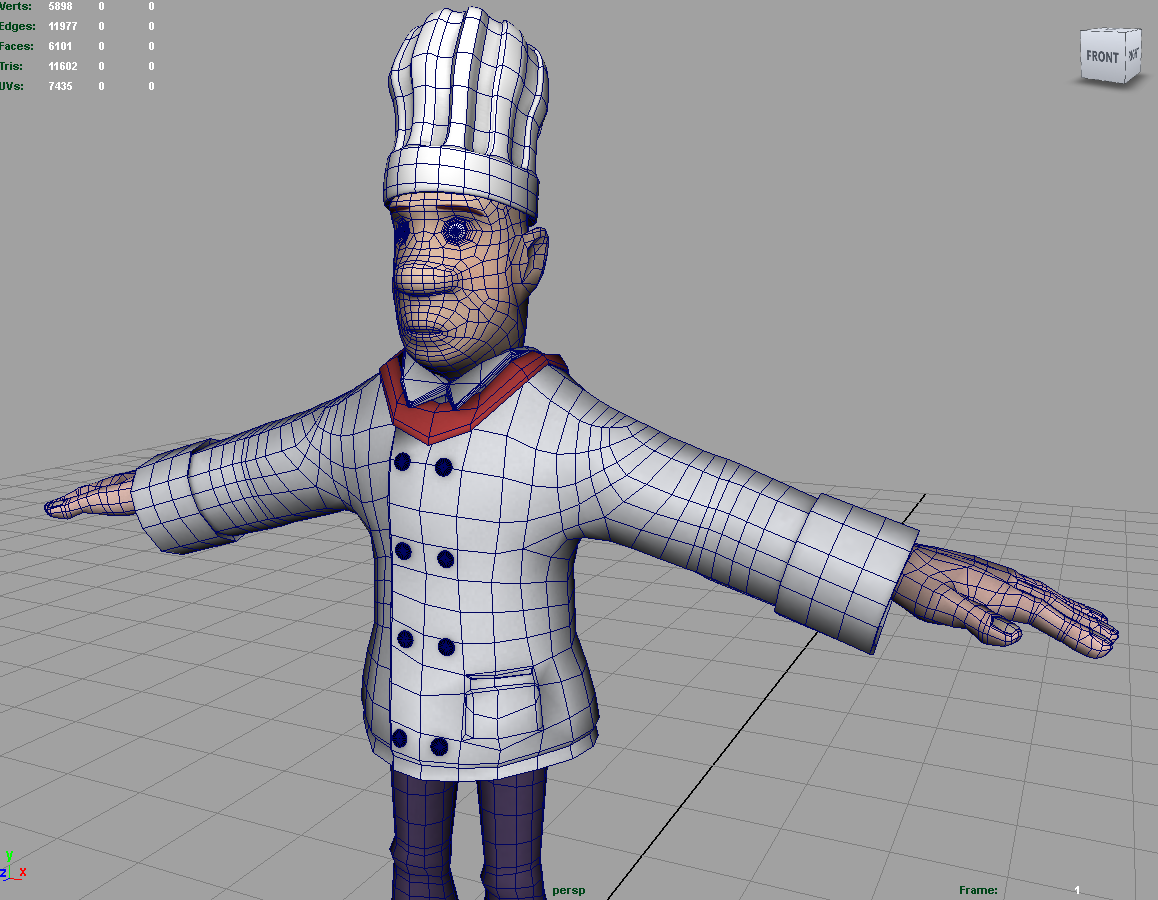
After some sound advice from my good friend/mentor Christine, I took a much closer look at how professional characters were modeled for various game engines. Most of the geometry on these characters was modeled to roughly follow the nearby muscle groups of the character. For example, even on characters that were fully clothed, you can still make out collections of shapes that flow in the same way that pectoral muscles flow. It just makes for nicer deformations while the character moves about.

So in the end, I decided to completely rebuild his upper torso. It took a bit of reworking, but now the geometry drapes across his shoulders almost like a tunic. Now as his arms drop to their sides, the geometry of the shoulder deforms in a more natural way. And I'm pretty darned pleased with the result!

From this experience, I have adopted a rule of thumb to always try to keep large muscle groups in mind while modeling. It's not an exact rule, but it helps to avoid the pitfalls of some possibly terrible deformation down the road.

Saturday, August 7, 2010

An animatic has arrived


Well, here it is! This is a rough animatic. No sound effects, music, and only half of the proper voices. (the other half awkwardly delivered by me so we can have something to time with). The recording for this was handled by the lovely Sonja, and she will also be helping to flush out the short with proper Foley work.

From here on we will adjust the timing, start collecting sounds, and as each shot gets completed it will be spliced into the animatic. When all is said and done, we'll have roughly about 2 minutes of footage for each of the two methods my thesis is focusing around.

Monday, August 2, 2010

I futzed with 5 million polygons for this dude


I wanted to add a lot more detail to this character than was visible in the last turnaround. I could add millions of polygons into the mix and sculpt them all perfectly, but this would present a couple problems:

  1. Animating high-detail characters is frustratingly slow and prone to crashing everything
  2. Loading, transferring, or saving high-detail assets is troublesome
  3. The source engine has a limit to the number of polygons a single object may have

So rather than make my character cumbersome and risk breaking the source engine, I cheated. I took this character and bumped him up to about 5 million polygons. That's enough to basically murder Maya on an average computer, so I did this in ZBrush and did some sculpting there. Then stamped all that detail back onto the original low-polygon character.

The result is a 9k character that has a *similar* level of detail to the 5million character. Shadows will play across his shirt as if the folds were actually there, but in reality he's a pretty simple dude. This technique is called 'Normal Mapping' and it's been used extensively in both games and films for years.